感谢来自 liushen 的轻量友链朋友圈
官方文档:https://blog.liushen.fun/posts/4dc716ec/
轻量朋友圈适配大部分博客
本教程采用 Serverless
1. Fork 仓库
Github
2. 制作友链信息
2.1自动制作
首先,在博客根目录添加文件link.js,写入以下代码:
1
2
3
4
5
6
7
8
9
10
11
12
13
14
15
16
17
18
19
20
21
22
23
24
25
26
27
28
29
30
31
| const YML = require('yamljs')
const fs = require('fs')
const blacklist = ["友站名称1", "友站名称2", "友站名称3"];
let friends = [],
data_f = YML.parse(fs.readFileSync('source/_data/link.yml').toString().replace(/(?<=rss:)\s*\n/g, ' ""\n'));
data_f.forEach((entry, index) => {
let lastIndex = 2;
if (index < lastIndex) {
const filteredLinkList = entry.link_list.filter(linkItem => !blacklist.includes(linkItem.name));
friends = friends.concat(filteredLinkList);
}
});
const friendData = {
friends: friends.map(item => {
return [item.name, item.link, item.avatar];
})
};
const friendJSON = JSON.stringify(friendData, null, 2);
fs.writeFileSync('./source/friend.json', friendJSON);
console.log('friend.json 文件已生成。');
|
随后安装依赖:
接着在根目录执行
就会生成 friend.json 文件,丢入 source 上传即可
2.2 手动制作
你可以手动制作该文件,格式如下:
1
2
3
4
5
6
7
8
9
10
11
12
13
14
15
16
17
18
19
20
| {
"friends": [
[
"清羽飞扬",
"https://blog.liushen.fun/",
"https://blog.liushen.fun/info/avatar.ico"
],
[
"ChrisKim",
"https://www.zouht.com/",
"https://cdn.qyliu.top/i/2024/06/27/667d880789765.webp"
],
[
"Akilar",
"https://akilar.top/",
"https://cdn.qyliu.top/i/2024/04/06/661170950f7a2.png"
],
……
}
|
3. 更改配置文件 conf.yaml
1
2
3
4
5
6
7
8
9
|
spider_settings:
enable: true
json_url: "https://blog.liushen.fun/friend.json"
article_count: 5
merge_result:
enable: false
merge_json_url: "https://fc.liushen.fun"
|
| 值 |
说明 |
enable |
必开啊,不开怎么用 |
json_url |
获取友链的 json ,仅支持网络地址 |
article_count |
每个地址最多获取的文章数 |
merge_result |
合并其他的友链数据 |
4. 开启 Github Action
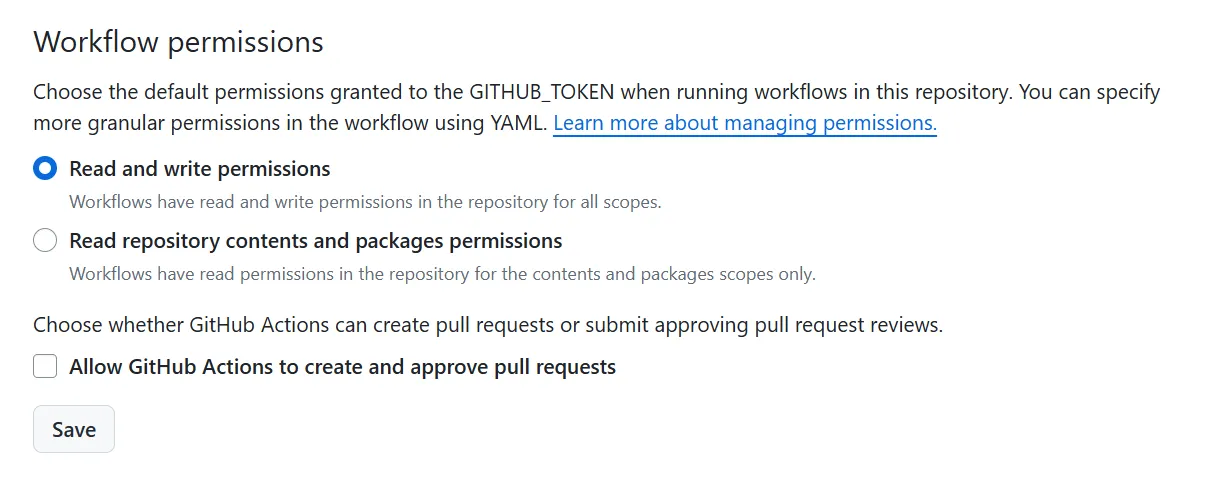
4.1 配置 Action 权限
把 Action 权限从只读改成可以读取和写入
![P1]()
P1
4.2 启用 Action
将Friend Circle Lite开启
开启后,每隔 4 小时便会运作一次。
5. 部署前端
5.1 托管
在托管商处,选择你 Fork 之后的仓库,将构建目录更改为 page 即可。
5.2 部署到页面
在页面中直接放置如下内容:
1
2
3
4
5
6
7
8
9
10
11
12
13
14
15
| <div id="friend-circle-lite-root"></div>
<script>
if (typeof UserConfig === 'undefined') {
var UserConfig = {
private_api_url: 'https://fc.liushen.fun/',
page_turning_number: 24,
error_img: 'https://pic.imgdb.cn/item/6695daa4d9c307b7e953ee3d.jpg',
}
}
</script>
<link rel="stylesheet" href="https://fastly.jsdelivr.net/gh/willow-god/Friend-Circle-Lite/main/fclite.min.css">
<script src="https://fastly.jsdelivr.net/gh/willow-god/Friend-Circle-Lite/main/fclite.min.js"></script>
|
其中 script 部分可以改成 js 文件提供。
6. 邮箱订阅
共两个部分:
1
2
3
4
5
| rss_subscribe:
enable: true
github_username: willow-god
github_repo: Friend-Circle-Lite
your_blog_url: https://blog.liushen.fun/
|
1
2
3
4
5
| smtp:
email: 3162475700@qq.com
server: smtp.qq.com
port: 587
use_tls: true
|
说明:
github_username 与 github_repo 主要是用来拼接 issue api。- 如果你开启这一部分,smtp 部分需要配置。
- 配置完后进入 issue 部分,新建 issue 即可看到邮件提醒模板,你可以删掉其他没用的模板。
设置 smtp 密码
在你 Fork 的仓库中,依次进入 Settings -> Secrets -> New repository secret,添加以下 Secrets:
SMTP_PWD: SMTP 服务器的密码,用于发送电子邮件。
结语
最后希望使用愉快!